"i'd tap that ass."
- Anathema
|
| Nafarias Sez #4 - The "Lost Temple" of TFC - Part One | | | Author: | | | IP: | 216.169.XXXX | | Date: | 05/23/02 07:05 | | Game Type: | Other | | Labels: | none | | Report Rating: , # of Ratings: 1, Max: 8, Min: 8
Lifetime Rating for Nafarias: 6.8889 |  |
The LONG awaited, much anticipated, often maligned, but well-defined Nafarias Sez Number FOUR!
|
Everyone's favorite arch-conservative is back in the saddle with yet another adventure into that
awful, slimy pus-filled cesspit that is the world of public TFC matches. Since my last battlereport, the Half-Life engine has
undergone a few changes. These changes have mostly been good, and one great change is the addition of a brand-spankin' new
'observer' mode that makes battlereporting a bit easier. Unfortunately it did not make FINDING a decent match to report any
easier - but that's another story. Sit back, get some corn, and prep your grey matter for...
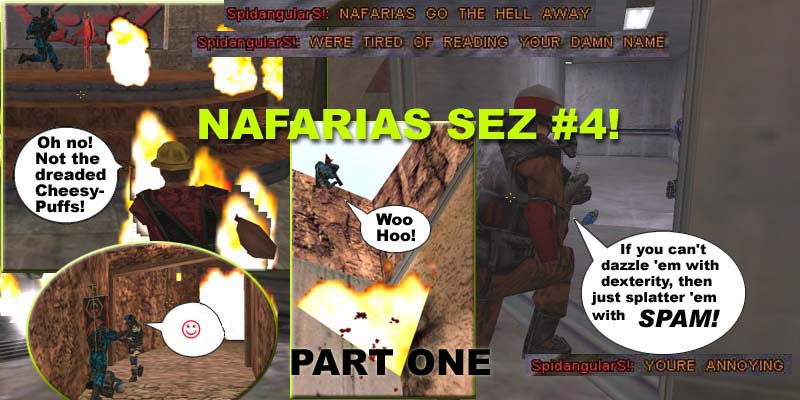
This battlereport comes in TWO parts. Part one (this one) is a very brief 'trainer' on what TFC is and how it is played.
If you already know TFC well, just look for Part two, which is all about the specific match I observed. Those of you not
familiar with TFC may want to read part one and learn about the lingo, the map, and the tactics that make TFC the great game
that it is.
THE GAME: TFC is a 'capture the flag' style online FPS game. Two opposing teams (red vs. blue) face off against
each other. Each team tries to grab the opposing team's flag and bring it to a 'capture point'. Once you bring the flag to
the cap point, your team scores 10 points, the flag returns to the enemy base and the whole thing starts all over again. The
team with the most captures at the end of the match wins the game! There are variations on this theme in some TFC maps, but
that is the general idea.
THE CLASSES: Capture the flag is a simple concept by itself. What made Team Fortress such a novel idea was the
introduction of different 'classes' a player could choose to play. Each class has strengths and weaknesses that make working
together as a team necessary and fun. People can play the class they are best at, the class that suits their mood, or the
class their team needs the most. It gives the game a lot of variety and keeps it fresh even after 4+ years. The class
differences and strategies are a whole report on their own, but in summary…
THE SCOUT:
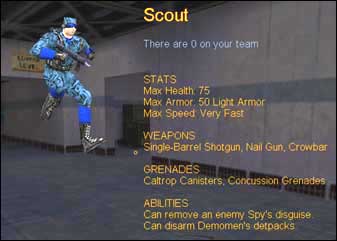 The weakest TFC class with only thin armor and modest health. Weapons are a light nailgun, a single shotgun, and a crowbar
(melee weapon). None of these weapons packs much of a punch. Why be a scout if they are this weak? BLAZING SPEED. Scouts
are the fastest TFC class and they are very useful if there are 'openings' in the enemy defense.
The weakest TFC class with only thin armor and modest health. Weapons are a light nailgun, a single shotgun, and a crowbar
(melee weapon). None of these weapons packs much of a punch. Why be a scout if they are this weak? BLAZING SPEED. Scouts
are the fastest TFC class and they are very useful if there are 'openings' in the enemy defense.
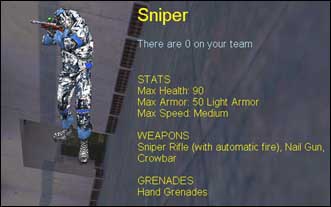
THE SNIPER: Weak armor and health. The sniper is neither a truly defensive or
offensive class (though it can help with both these team roles). Weapons are a crowbar, an autorifle (hitscan type machine
gun), a light nailgun, and the 'sniper' rifle that has a powerful zoom and 'charges up' to deal massive damage. Charges
sniper rifle shots instantly kill if they hit the head, and will either kill or severely injure any class with even a regular
hit.
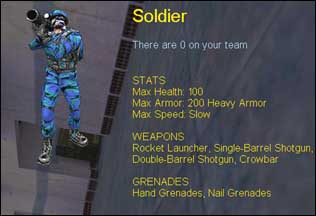
THE SOLDIER: The backbone class of offense or defense. Soldiers ('sollys') have tough armor and health.
They are very slow, but pack a powerful punch. They carry a double shotgun, a single shotgun, a crowbar, and the rocket
launcher. Sollys are great for defense at choke points, and the rockets have the power to break many a defensive stalemate
on offense.
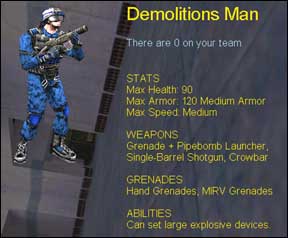
THE DEMOMAN: Demomen have medium speed
and armor. They carry a single shotgun and crowbar, but their real weaponry is in their pipegun. The pipegun can either
drop 'blue' pipes that blow up on contact (or after a few seconds), or 'green' pipes that when you hit a key. Both pipes
pack quite a wallop. Three green pipes going off at once is usually enough to kill anyone. Demos also have a 'detpack' that
they can drop (once per life) that is used to 'open' special entrances on some maps and also kill anyone that is too close
when it goes off.

THE MEDIC: Another
'backbone' class. The Medic is faster than any class but the scout. It also has good armor and health. The Medic packs
good firepower too with a super nailgun, a double shotgun, a light nailgun, and the medikit. The medkit is a melee range
weapon that instantly heals a teammate to full health, and 'infects' an enemy player. An infected player is only cured when
they either die or a friendly medic heals them. Infected players also infect their own teammates if they 'touch' them. Most
light offense players will play Medics because they are fast, pack a wallop, and are much more durable than a scout.
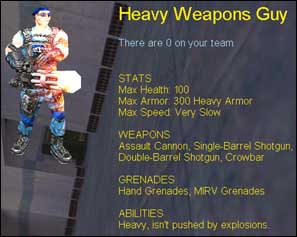
THE HEAVY WEAPONS GUY: Known as the "HW Guy", this
class is the slowest in TFC but also the most durable with 33% more armor than even a soldier. He has a crowbar, a single
shotgun, a double shotgun, and the dreaded assault cannon (a chaingun). The AC deals out unholy damage at close range, and
spreads out in a wide 'cone' that deals heavy to minor damage at medium to long ranges (the further away, the less damage).
Firing the AC also slows the HW Guy down even more than usual. A talented HW Guy can be a real asset to the team on either
offense or defense.
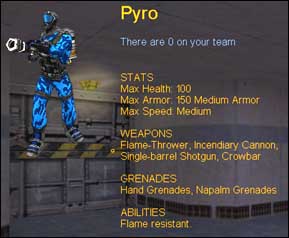
THE PYRO: A curious class. Blessed with good armor (3rd most in the game) and good speed
(3rd fastest in TFC) the Pyro is a medium assault class. The Pyro carries a crowbar, a single shotgun, a flamethrower, and
an IC cannon. The Pyro is arguably the toughest class to master. The flamethrower is a medium to short range weapon that
spurts out little 'puffs' of flame that do light damage. The puffs come out fast though and a talented Pyro can drop any
class if it gets in close. A great class for distracting enemy players. In the hands of a master, the Pyro is as annoying
as even the best sniper.

THE SPY: A tough defense with engineers, sentry guns, and heavy classes all in the same choke can be very
hard to crack without a good spy helping. Spies have medium speed, armor, and health. The Spy can disguise as an enemy
player and when disguised they are not detected by enemy sentry guns. Spies can confuse enemy defensive players as well and
allow other players to slip past. Spy weapons include a light nailgun, a double shotgun, a 'tranq' gun that slows down enemy
players, and a combat knife. The knife is a melee range weapon that instantly kills enemy players if it hits from behind in
the head. Spies are great for 'cracking' tough defense and delivering a timely payload of grenades or making a critical flag
touch.
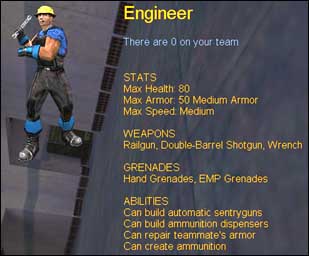
THE ENGINEER: A defensive
class with medium speed, light armor, and low health. The Engy carries a wrench (melee combat weapon), a railgun (think of
it as a weak, slow pistol), and a double shotgun. The Engineer's strength is in his sentry gun. A level 1 sentry gun is
only good for weakening players. A level 2 gun will take down medics, scouts, pyros, and demomen quickly, and will also do
heavy damage to sollys and HW Guys. A level 3 gun shoots rockets and will take down any class but a full-health HW Guy
almost instantly. Engys plunk sentries in key defensive positions to prevent the team flag from moving, but can also use
sentries to 'lock down' enemy players in other places sometimes. Engineers can also fix friendly players's damaged armor by
whacking them with the wrench. They can also build 'dispensers' that give ammo and armor by touching them. Dispensers can
also be detonated like a bomb for a humiliating death.
GRENADES:A powerful TFC game dynamic is the presence of grenades. Grenades can make or break your performance in
TFC and talented grenade use is one of the hallmarks of a 'good' player versus a newbie. Grenades come in various
kinds...
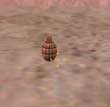
THE FRAGMENTATION GRENADE: The 'frag' grenade is a standard pineapple that deals out a large amount of
damage. Snipers, Soldiers, Medics, HW Guys, Demomen, Pyros, Spies, and Engineers carry frag grens.
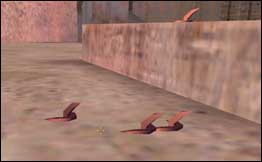
CALTROPS:Only the scout has this grenade. It isn't even a
grenade really. This just drops a bunch of little spiked things on the ground. An enemy player that steps on a caltrop will
get a tiny prick of damage, but will also have their speed dropped to a mere crawl. These things aren't too useful, as the
spikes can be dodged or jumped over. However, they sometimes give a scout with the enemy flag a critical second or two they
need to escape.
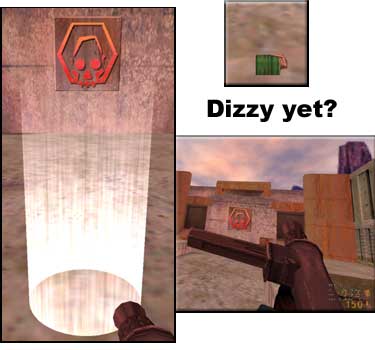
CONCUSSION GRENADE:This little box pops out a white 'bubble' when it goes off. Anyone caught in the bubble
gets a double whammy. First, they are 'flung' out away from the grenade at high speed. This can displace enemy defense and
provide a critical 'opening' past enemy sollys, HW Guys, etc… Second, players in a conc blast are get a 'dizzying' effect
where their screen wobbles around (roll your eyes around slowly in your sockets while shaking your head and you'll get the
idea). This makes aiming very difficult. Scouts and Medics carry concs.
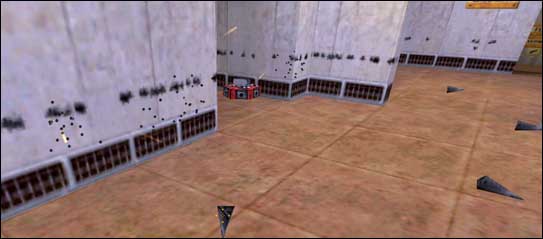
NAIL GRENADE:The soldier has these babies. This tosses out a 'box' that rises to waist height in the
air and starts spitting out 'nails' in all directions. The nails only do a tiny bit of damage, but come in a constant stream
and can do massive damage if you are too close. After a couple seconds they blow up like a frag gren. These are good for
'clearing' a room, blowing up sentries, or holding a choke for a second or two.
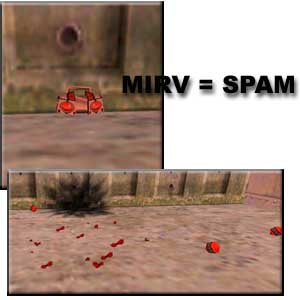
MIRV GRENADE:The MIRV is a deadly package. This big box goes off in a
sequence of two explosions. The first explosion does the same damage as a regular frag grenade and spits out four 'bomblets'
in different directions. The bomblets then go off - each ONE doing frag gren damage. This is a lot of explosions in a small
area. Good for clearing out tough defensive chokes and killing sentry guns. HW Guys and Demomen get MIRV grens.
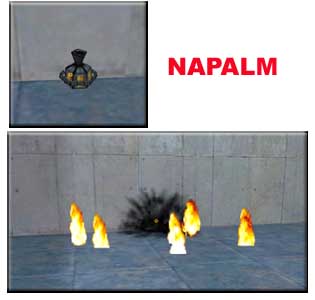
NAPALM GRENADE:Only the Pyro gets this. These blow up and do only a
tiny bit of initial damage, but spread out a patch of fire that covers a modest sized area. Anyone walking on the fire takes
damage and catches on 'fire' themselves. The flames last a while. Not great in terms of damage, but it can be very
annoying.
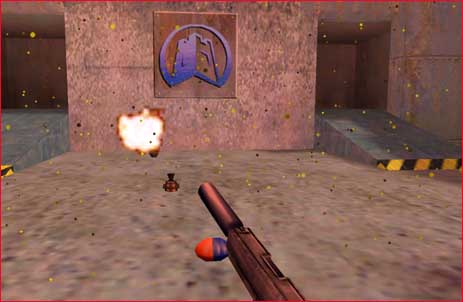
GAS GRENADE:Only the spy gets these puppies. When a spy drops one, it lets out 'gas' (which in
Half Life looks like a bunch of dots). Anyone in the gas takes damage and starts hallucinating (seeing fake grenades, shots,
etc…). This gas goes through walls, and the grenade lasts a LONG time and covers a BIG area. These are really annoying and
can force an enemy defense out of position long enough to make a critical move. Gas damage 'stacks' with multiple gas
grenades, and 3 gas grens going off in the same area can quickly kill an enemy player stupid enough to take a sauna in the
dots.
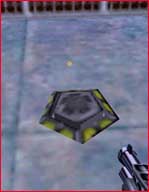
EMP
GRENADE:The Engineer gets this 'green ring of death'. The EMP is a disc that goes off in a green ring. Any explosive
in this ring blows up and deals massive damage. A player carrying a load of ammo gets fried by this kind of damage. This is
a very powerful grenade and can make the frail little Engineer a force to be feared even by the mighty HW Guy. Players will
often drop all their excess ammo when they know they are heading into EMP country.
WEAPON JUMPING:No description of TFC would be complete without explaining weapon jumps. Weapon jumps are (quite
simply) when a player uses a weapon to 'jump' higher than they could normally jump. Weapon jumps greatly alter the game by
allowing player classes to reach places in a single jump that they would normally have to walk long distances to get at - or
to circumvent tough defensive chokes by going over/around them. Skilled use of weapon jumps separates a 'good' player from
an 'average' one (much like proper grenade use). There are other weapon jumps other than those listed here, but these are
the most important ones.
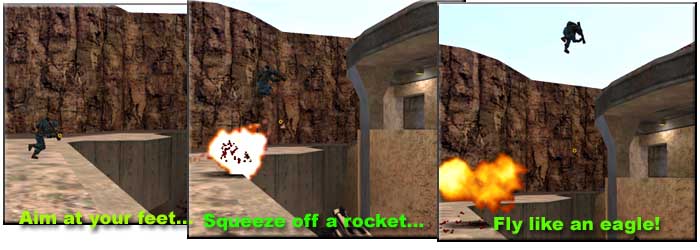
ROCKET JUMPING:
Soldiers and Pyros can aim at the ground with their rockets. All you do is aim at the ground near your feet and fire a
rocket while jumping. This gives a boost in height, and the added mobility gives critical access to areas of a map. A solly
can take about 3 jumps before their health is critical level. A Pyro can Incendiary Cannon jump about 8 times since the IC
does only light damage,but IC jumps are nowhere near as good as a solly rocket jump.
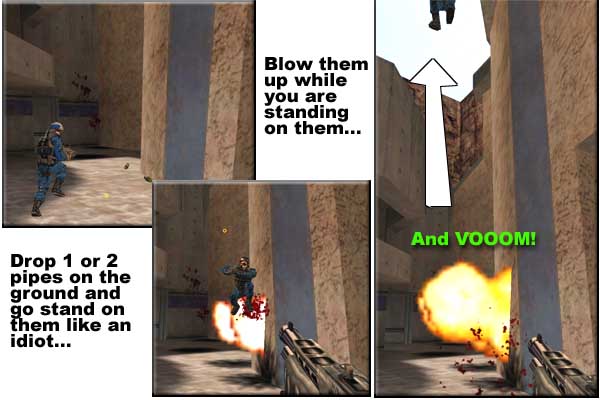
PIPE JUMPING: Demomen can do a similar jump to a rocket jump by dropping a
'green' pipe on the ground, jumping over it, and blowing it up at the right time. Two green pipes throw you a country mile
and leave you weak as a kitten. Three green pipes blow you up, so don't do it… ;)
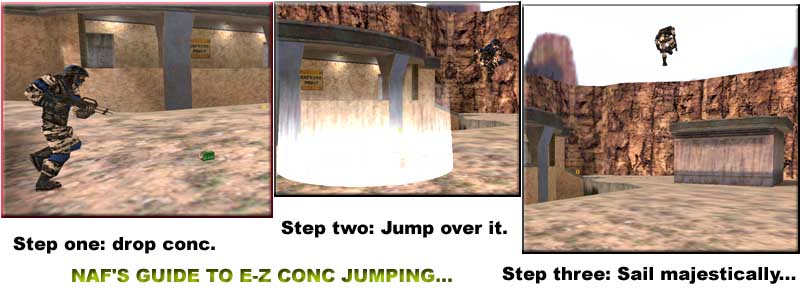
CONC JUMPING:
Conc grens are designed for use against enemy players. However, if you time your jump just right, you can fling YOURSELF!
The conc 'fling' effect is quite powerful, and can give you tremendous height and distance. A talented Medic or Scout on
your team that knows their conc jumps can mean the difference between victory and defeat.
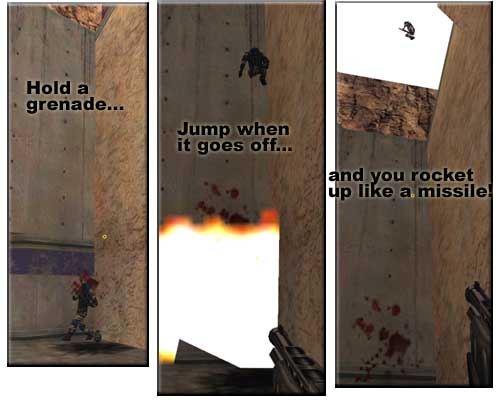
FRAG JUMPING: The common frag grenade can give a powerful upward jump. You prime the grenade, but DON'T release it.
If you jump just before it goes off, it rockets you up in the air a great distance. However, as you might expect it does
massive damage. A solly loses about half their health and armor from a single frag jump. Medics, Pyros, Demomen, and Spies
are reduced to fragile wrecks. Engys and Snipers can't frag jump because the damage kills them. HW Guys are so fat that they
can't frag jump at all.
THE MAP:
Knowing your battlefield is half the battle. In Starcraft, players who know their map well will have a strong advantage
over a player who has never played on a specific map. This rule of thumb applies in TFC as well. In Starcraft, the most
over-used map of all time is "Lost Temple". Everyone complains about how tired they are of Lost Temple, and how they wish
everyone would play other maps more often. And yet somehow, no one ever STOPS playing Lost Temple or refuses to play when a
game shows up. This is because everyone KNOWS the map well, and they don't want to play on a map they don't know like the
back of their hand.
TFC proves this trend is not exclusive to the RTS genre. Let me introduce you to the "Lost Temple" of Team Fortress
Classic. The most overplayed CTF map in TFC history: 2Fort. 2Fort has a long history behind it. It was one of the first
maps ever made for Team Fortress way back when it was just a mod of Quake 1. The map was retooled and included in TFC as a
'default' map, and almost every CTF game has its own version of 2Fort even today. At any given time I'd estimate a good 25%
to 33% of ALL TFC servers are running 2Fort, and there are many '2Fort Only' servers. Everyone complains, whines, and moans
about it - but they still end up joining servers running 2Fort. Again. And again. And again. If you want to play TFC then
it is wise to learn the 2Fort map. Most capture the flag maps in TFC can basically be considered variations on 2Fort.
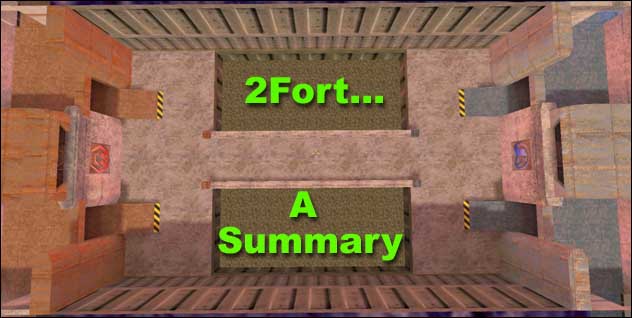
2Fort is what is known as a 'symmetrical' map. Enemy teams start off in their 'base'. Symmetrical maps contain enemy bases
that are EXACTLY identical to each other. This eliminates potential map balance problems, but does make the map predictable
(which might explain its popularity). The map is broken up into 11 areas.
1. The bridge
2. The water
3. The main entrance
4. The sniper deck
5. The ramp room
6. The main respawn deck
7. The spiral
8. The basement
9. The elevator shaft
10. The main respawn
11. The secondary respawn
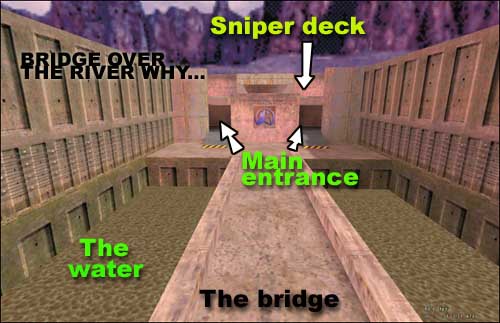
THE BRIDGE:The no man's land in 2Fort is a single bridge that leads to the enemy base. Offense players must cross
this area in order to reach the enemy base. Quite often the bridge is the scene of serious fighting because if you can delay
(or stop) your enemy on the bridge, then obviously your base is going to be pretty secure. Heavy offense players often
'deathmatch' on the bridge, making it a painful place to cross. Snipers also make the bridge very dangerous because you are
totally exposed and vulnerable to a headshot.
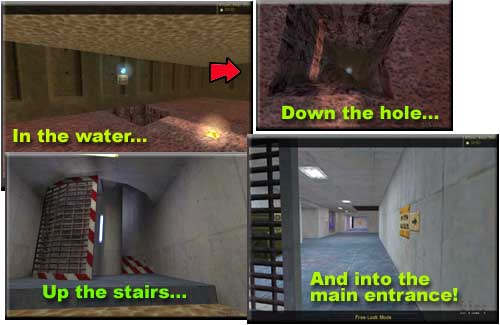
THE WATER:A large moat of murky green water separates the two forts. If you jump (or are knocked) into the water,
there are tunnels that lead into a corner of each base's main level via a large spiral staircase. The water entrances are
not particularly useful unless enemy snipers are making the bridge difficult. Players rarely use the water entrance because
it is much faster to weapon jump into the enemy base, and the water entrance does not put you anywhere useful.
The water popular for medics and scouts as the water hides you from enemy snipers and lets you avoid damage from heavy
offense players duking it out on the bridge. Conc jumping from the water puts you right on the sniper deck.
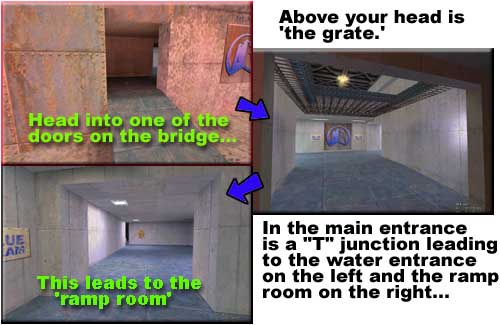
THE MAIN ENTRANCE:Once you get past the bridge you find yourself at the main entrance of the enemy base. The
entrance has two doors on the bridge, but both doors lead to exactly the same place. Once you enter the doors you find
yourself in a hallway that splits to the right and left in a "T" junction. If you go to the left, you find yourself at the
top of the spiral staircase that leads to the water entrance. If you take the right passage, you find yourself at the main
lower entrance to the ramp room. The "T" junction to the left also has a passageway that goes around a corner and leads to a
secondary entrance to the ramp room. In the ceiling of this passageway is a 'hole' that drops from the secondary respawn
room (see "Secondary Respawn").
The main entrance also has a 'special' way around enemy defense. If you look at the ceiling when you go in the main
entrance, you will see a 'grate' with a hole above your head. It is possible to weapon jump UP this grate with a little
practice. If you do, you find yourself in a little room that leads to either the main respawn deck or the spiral. This
'grate' entrance is a critical map feature. Defense tends to be pretty stiff in the main respawn deck and the ramp room, and
the 'grate' entrance is a great way around it. Grate defense is possible, but it is hard to stop soldiers from jumping up
the grate and dumping nail grenades into the main respawn deck to blow up sentry guns. If soldiers can blow the sentry guns
in the main respawn deck then the spiral is wide open.
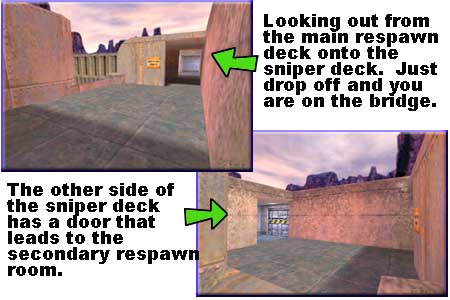
THE SNIPER DECK:If you don't want to use the main entrance and you know how to weapon jump then you can just pop
onto the sniper deck. The sniper deck is where your capture point is also, so if you get the enemy flag then for heaven's
sake take it to your OWN SNIPER DECK and not YOUR BASEMENT. The deck is where snipers like to hang out. Once you get onto
the deck there is an opening to your right (facing in) that leads to the main respawn deck. To the left (facing in) is a big
metal door that leads to the secondary respawn. Lots of offense players weapon jump onto the sniper deck just so they can
beat the crap out of those annoying snipers.
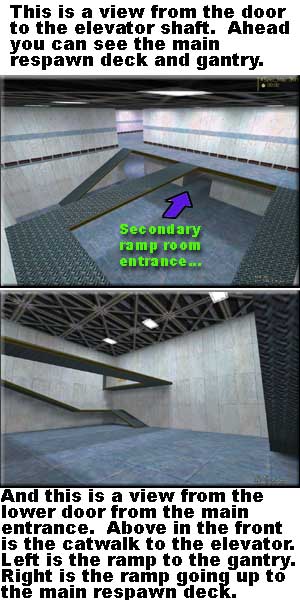
THE RAMP ROOM:The ramp room is the setting for some of the nastiest fighting in 2Fort. Basically, the ramp room is a
central 'hub' area within the enemy base. There are three 'walkways' in the ramp room. One walkway is a ramp leading up to
the main respawn deck. The other walkway hugs the far wall and leads to the top of a gantry. The third is a 'bridge'
catwalk that leads from the gantry to the elevator shaft (going to the basement). This catwalk can either be reached with a
weapon jump, or by walking up one of the two other ramps in the ramp room to the gantry.
Lots of public server players heavily defend the ramp room. I have never understood why, because the ramp room is easily
circumvented by weapon jumping up the 'grate' entrance, or entering the spiral from the main respawn deck via the sniper
deck. Also, it is hard to defend the ramp room well against a determined and skilled offense because it has so many
entrances and holes. Defense is more wisely concentrated in the basement around the flag itself because once you get past
the ramp room the flag is your oyster unless there is MORE defense in the basement to back you up. If you defend the ramp
room, then you also must defend the upper spiral entrance and the main respawn deck or enemy O WILL get past you.
THE MAIN RESPAWN DECK:This map area is a critical spot. The respawn deck has two metal doors that can only be
opened by 'friendly' players. These doors lead right into the main respawn room where there is armor, health packs, and ammo
bags. There are four ways 'out' of the main respawn deck. One way is to go out the opening that leads to the ramp room.
Another is the side door that goes out onto the sniper deck. The third is the door that goes down the spiral, and the last
is to drop out of your 'grate' to the main entrance.
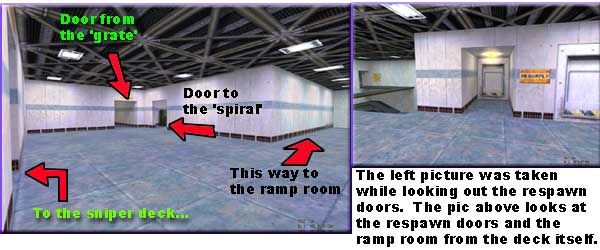
Defense is usually heavy here. Engineers put sentry guns in the far corner so it will kill enemies coming in from the
sniper deck and cover the upper spiral entrance. Soldiers will stand guard at the doorway to the spiral. Attacking players
dump lots of grenades into the respawn deck to clear enemy defense. Heavy offense will often squat just outside the respawn
room and kill players as they come out. This practice is called 'respawn camping' and it is usually banned or strongly
discouraged.

THE SPIRAL:The spiral is a funky place. It is a big corridor/ramp that 'spirals' in a circle downwards until it
reaches an opening into the basement (where the flag is). The spiral's 'top' opening can be reached from the main respawn
deck (which in turn is easily reached from the 'grate' or the sniper deck). The spiral is one of only two ways to escape
from the enemy basement when you have the flag. Expect to get killed a lot on the spiral because it is easy to defend.
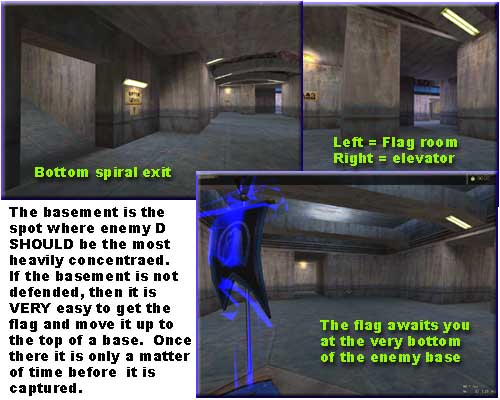
THE BASEMENT:The basement is where the flag is. There are only two entrances - the bottom spiral opening and the
elevator shaft. The spiral opens out into a hallway area. To the left are two passages that lead around a corner into the
flag room itself. To the right there is a passage that continues on a bit and leads to a metal door (with ammo, health,
armor, and grenades) and then to the elevator shaft. An engineer that plunks a sentry gun in front of the two passages
leading into the flag room can stop any offensive effort. A solid basement defense consists of at least one engineer and one
soldier. Spies become critical when basement D is solid, as they are sometimes the only class that can get grenades at
well-placed sentry guns. The elevator shaft can also help to deliver a payload (as long as the ramp room isn't
defended).
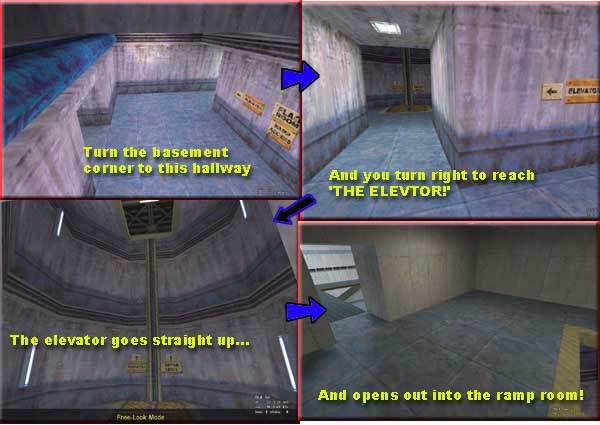
THE ELEVATOR SHAFT:The elevator can be reached at the top by an opening into the ramp room from the catwalk (see
"Ramp Room"). If you drop down the shaft, you end up standing right in front of the metal door in the basement that has
armor, heath, and ammo. Keep following the passage and you will be staring at the basement spiral opening in front of you,
and a corner that turns into the flag room to your right. The elevator is the only thing that keeps 2Fort from becoming a
'defend the spiral!' nightmare. Clever offense can grab the flag and weapon jump out the elevator shaft. This makes it so
defending players have to always 'worry' at least two openings.
THE RESPAWN ROOMS:
I'm not going to bother describing the actual respawn rooms themselves. They are sealed so hostile players cannot enter
them. Friendly players can go in and stock up on health, armor, ammo, and a single grenade bag. The secondary respawn room
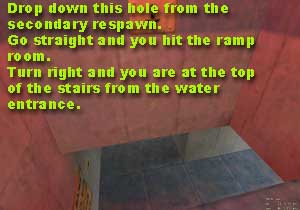
opens out onto the sniper deck (see "Sniper deck"), but has one other curious feature. The second exit is a little 'hole'
that drops you down into that little corridor that leads to the secondary lower opening of the ramp room (see "Main
Entrance"). Enemy players can weapon jump up this little hole into the respawn area. However, such an action is generally
pointless since all respawn rooms have automated sentry cannons that blow you to smithereens even if you are a spy.
That's all for now folks (as if it wasn't enough). You know know everything critical you need to know about TFC and 2Fort!
Congratulations! Stay tuned for PART TWO when we see all this information put into practice by clan ETOL as they
battle it out with a group of random public server crawlers. What do YOU think will happen? Stay tuned and find out!
THIS HAS BEEN A "NAFARIAS SEZ" PRODUCTION!
|
|
| |
 Home
Forum
Starcraft Tournaments
Home
Forum
Starcraft Tournaments
