|
Today I am presenting you with a new report
that this website, in its current state, graciously opens its
arms to. I am proud to present you the first report on Combat
Mission: Afrika Korps (CMAK for short). Be advised: This report
is pic-heavy.

CMAK is a 1-2 player, hybrid turn-based/realtime
3D simulation of WWII tactical warfare in parts of the Mediterranean
Theater including North Africa, Italy, Sicily and Crete from
1940 to 1945. The fluid game interface combines with 3D lines
of sight, misidentification of targets, enemy detection by sound,
advanced armor penetration systems, unit morale and leadership
effects, spreading fires and billowing smoke, wind and weather
- and much more to bring you unprecedented realism in a computer
simulation.
Units are squads, teams, and individual vehicles. You can command
a force as small as a depleted platoon, or as large as a several
reinforced battalions. Each man and weapon is kept track of for
maximum realism but because of the power of today's desktop computers
not every single man in the squad will be shown. Three men show
a normal squad, one man shows a company of a platoon leader,
etc.
Full Tables of Organization and Equipment for all the nations
represented (Germany, USA, Italy, Britain, Canada, New Zealand,
Australia, Poland, South Africa, France) are modeled with thousands
of different unit types available depending on the year, month
and region.

There are two types of maps in Combat Mission:
Afrika Korps. Battle and Operation maps. Individual fights will
occur across a Battle map while the longer operations (several
linked battles) are fought with the Operation maps.
Each turn is equal to 60 seconds of combat. Players give orders
in a turn-based fashion, and then these orders are simultaneously
executed for 60 seconds of real time action. Then the next orders
phase begins. A typical scenario lasts about 20-60 turns, or
20-60 minutes of simulated combat but the player can adjust this.
While the game is based on its award-winning
predecessor, Combat Mission: Barbarossa to Berlin, it introduces
new desert environments and terrain types, as well as features
like multi-turreted vehicles and dust clouds from explosions
and moving vehicles.
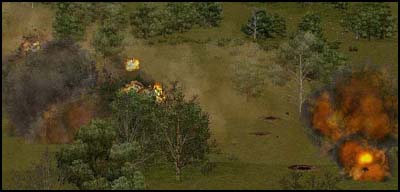
Before I start on the report itself, I
would like to say that if my report on the game is crappy, that
in no way makes the game itself crappy but you already knew that.
February-April 1944: The situation in
Italy was looking bleak for the Germans. The Allies were, slowly
but surely, working their way up the boot. The constant bombardment
by allied aircraft was hammering at German moral. Not even the
heavy casualties inflicted on the Allies at Monte Cassino could
stop them. Eventually, the allies broke through but with resistance,
it looked like the war was going to drag on forever. One of the
places that the allies had trouble with was in eastern part of
Italy. Allied High Command knew that there was a company of Germans
that retreated from Monte Cassino to the small town of Pescara.
Allied High Command could only spare one platoon of American
Paratroops with supporting armor. Before the Americans arrived,
the area was carpet bombed to soften up any Germans that might
they might encounter. Unknown to them, the Germans were racing
to capture Pescara and set up defensive positions in the town
before the Americans arrived...
The game was to be played against Head
Hunter, a fellow CMAK player that was interested in a Meeting
Engagement, which means that both sides try to grab the objective
in the middle of the map and prevent the other side from taking
it. He took the Germans while I took the Americans. The settings
for the map were unbiased and we both got to pick our forces.
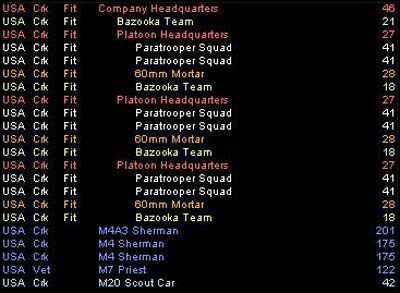
I picked a company of veteran paratroops,
which included six squads of paratroopers, four bazooka teams,
and three 60mm mortar teams. The assortment of armor included
two M4 Shermans and one M4A3 Sherman, all three were reliable
but inferior to the German armor, an M7 Priest, self-propelled
artillery, and one scout car. It took a while for me to get everything
right, with everything being balanced to tackle anything that
the Germans might throw at me. Just in case the Germans were
a little armor happy, meaning they had a lot of armor, I made
all of my soldiers crack troops, meaning they are elite.
After I carefully selected the troops that
will march into the battle, I pressed done and the map started
loading. After it loaded I carefully inspected the map and the
routes that I should take. There was one main road that ran from
my start location, through the village, and out of it where the
road forks. The village was between both of us but it was on
a hill. This might be good for the side that doesn't arrive at
the town first because they would have an excellent opportunity
to shoot at the troops on the hill. The objective flags however
were not in the town. They were outside of it, with each being
on one side of the forked road (for better understanding I will
call them Flag1 and Flag2). After some quick planning (there
is a time limit on how long you could take), I decided that the
armor should take the main road into the town, while the infantry
run up the hill and take the town from the back. From there they
would consolidate their positions, use some troops to take the
flags, and use the other troops and tanks to support the attackers.

The slowest troops that I had, the mortar
teams, embarked on the tanks so they would get to the village
before anyone, be scouts and track the location of enemy units,
and bombard any oncoming Germans. The first couple of turns were
quiet, with me moving my forces closer and closer into town.
The only action that came was when my scout car began firing
on some Germans that were running towards a forest that divided
the Germans from the flags. Out of nowhere a Panther popped out
of the trees and opened fire on the scout car, knocking it out.
After it came a Marder tank destroyer, the same kind as that
one that was firebombed by Molotov cocktails at the end of Saving
Private Ryan.
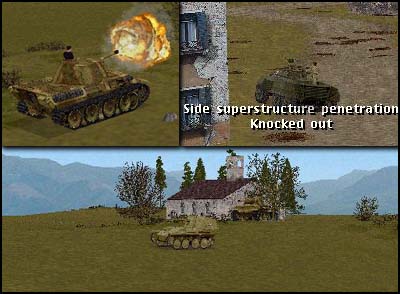
A Sherman that was behind the scout car
took cover behind a church, the most dominating feature of the
town. The Sherman reversed a little so it would be able to fire
on something: The Marder. The Sherman got two hits on the Marder,
the first was unsuccessful… the second was. Meanwhile, the
Panther retreated behind the trees, giving my tanks an opportunity
to rush into the town. One Sherman that rushed into the town
got a hit on a German half-track that burst into flames. After
most of the tanks rushed into the village, I placed all of them
behind the church, and dismounted my mortar teams, which ran
into the rubble of a destroyed building.
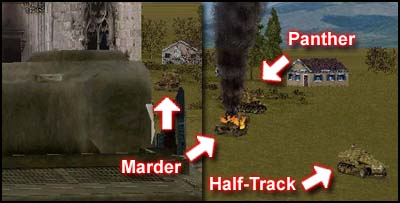
The Panther would be a thorn in my side.
With its armor, none of my tanks could penetrate the Panther
from the front. All I could pray for was a lucky hit on the Panther,
that is, until I figured out a plan to take it out.
As my infantry began entering the rear
of the town, most of my armor became focused on a large group
of German infantry, which were crossing a forest in order to
get to flag2. As tracers zoomed by their heads and with shells
exploding all around them, the Nazi storm troopers took cover,
slowly sneaking towards the brush that came after the forest.
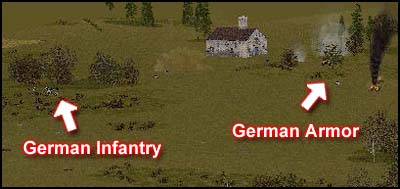
When all of my infantry was inside the
town, I split them into two groups. One group would take Flag1,
which was just outside the town, and the others would stay in
the town and provide covering fire. Knowing that the Panther
would probably fire on them, I gave my mortar teams the job of
taking it out. Most of the rounds they fired missed the tank
entirely except for one, which hit the top of the tank but caused
no damage. Hunter, knowing full well that if the teams couldn't
see the tank they couldn't get a good shot on it, placed smoke
all around the Panther, which reversed backwards.

Meanwhile, the German infantry were slowly
sneaking towards the road that separated them from flag2, but
under merciless fire. The ones that put up their head found an
American flag being raised at Flag1.
Meanwhile, the tank-to-tank battle was
steadily rising in intensity. One of my Shermans found a half-track
trying to ferry German troops to the front line. The half-track
was wasted, knocking it and its operation out of the war. Meanwhile,
one of my Shermans was targeted by the Panther, which let off
one round that decimated the Sherman, which explode. The explosion
was huge! I believe I have never seen an explosion that big in
CMAK for a long time.
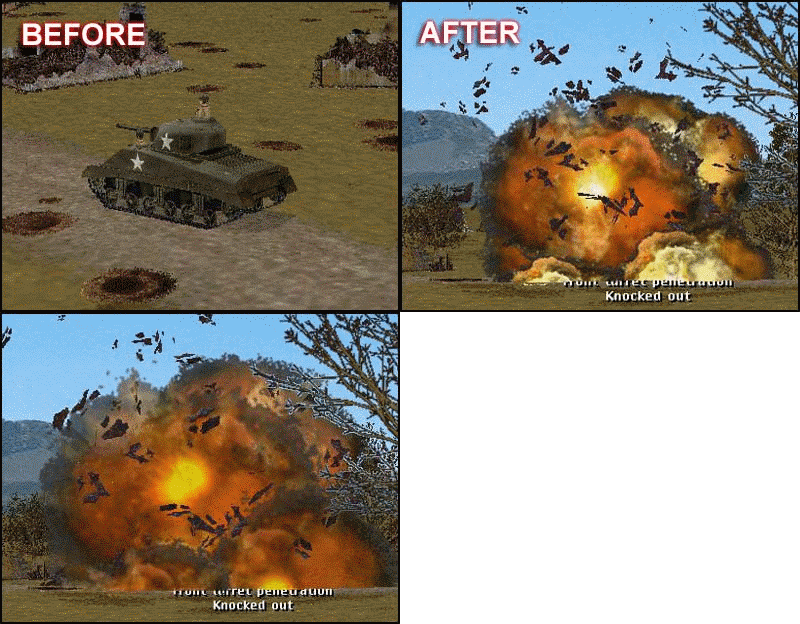
After that, the Panther targeted the Church,
where most of my armor was hiding behind. I guess Hunter found
out what happened to the tanks that rushed across the town, as
his Panther opened fire and razed the church. The Priest behind
it shot at the Panther, immobilizing it but in turn becoming
"halp"less and being knocked out, freeing the Germans
from the constant fire they were receiving. Hunter took advantage
of this and began an assault across the road to the flag.

Seeing the Germans rushing towards the
road, I split the team that took Flag1 in half and rushed one
half towards Flag2. Flag2 was sitting on a small wooded area
with a house nearby. Since the Panther began shooting at these
troops, I couldn't risk them in the building, which would eventually
crumble due to the heavy damage it would receive from the Germans.
As my troops arrived at Flag2, another
German squad was rushing the flag. The half of the team that
stayed behind at Flag1 began to provide some covering fire, as
the Germans ducked for cover. My assaulting squad grabbed the
flag, aimed their rifles and eliminated the German squad. This
small skirmish would not be the last, as a group of Nazi storm
troopers crossed the road and made a mad dash towards Flag2.
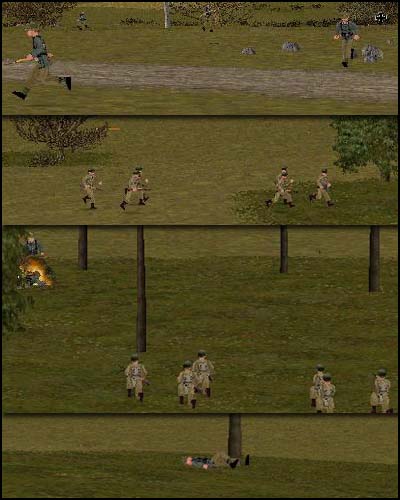
The first couple of teams got shred to
pieces by the merciless fire from my paratroops. The next couple
of squads slowly crawled towards their objective: Flag2. The
Nazis did advance with covering fire, coming from the panther
that bombarded my paratroops defending Flag2. Most of the paratroops
dropped to the ground while still shooting at the oncoming Germans.
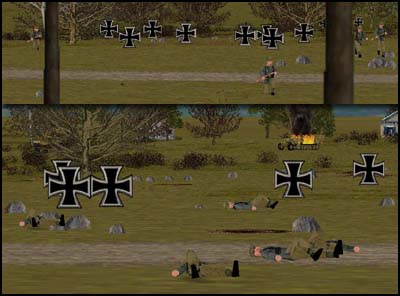
Seeing that there was a large amount of
German infantry moving towards Flag2, I called up all the troops
I have to defend Flag2. I called up the troops in the town, which
under fire moved towards the objective. The panther was giving
me a real headache, but none of my weapons could go through its
frontal armor. The only way to stop it would be to take it out
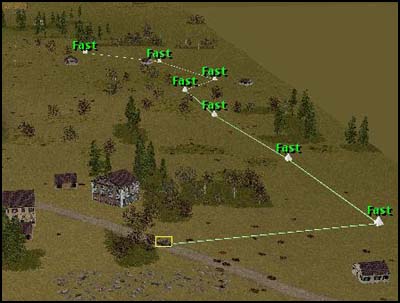
was to go around it. I had one Sherman left, which was hiding
behind a hill. I put one and one together (two and two would
have sounded better) and started plotting points where the Sherman
should go in order to avoid being fired upon by the Panther,
while also carefully sneaking around it and, hopefully, knocking
it out of the battle. The next couple
of turns the tank would have to zigzag through a valley full
of trees, rocks, and the threat of discovery by the Nazis.
Meanwhile, the real battle was being decided
at Flag2, where the battle was intensifying every minute. The
paratroops defending the flag were under heavy fire from the
Germans, who just kept on coming with, what looked like, an unlimited
number of soldiers. The Panther kept on bombarding my troops,
so the Sherman that was trying to sneak behind it was given special
priority, as I really wanted to pay the Panther back for all
my losses.
The Sherman was going through the valley
but sadly the Panther saw it and swung its 75mm gun around and
let off one shot, which, thankfully, missed. The Sherman then
rushed into the trees stopping for the cover. I then ordered
it to quickly go around the Panther. The area that the Sherman
would have to go through was a coverless area so I knew there
would be a tank duel, unless it could get by without one. The
Sherman rushed out and was hit by the Panther, immobilizing it.
The Sherman now had no choice but to fire or die. The Sherman
shot its 75mm gun, which penetrated the Panther at its weak point,
probably hitting it just underneath the turret, but not knocking
it out. The Panther recovered quickly and blasted the Sherman
away. With that the Panther crew called it quits and abandoned
the tank. I guess the damage was great and the crew didn't want
to risk staying in the tank, which might explode if the ammunition
inside is triggered.

Nevertheless, the battle was still raging.
Flag2 was slowly attacked by a couple of German squads, some
of which died while the others retreated. I reinforced the paratroops
at Flag2 with every soldier I could find and then I did what
every commander would do to keep the enemy on its toes: Counter-attack.
I gathered every soldier I had and order them to charge the German
positions. As the troops are rushing the enemy foxholes, I hoped
and prayed the Germans wouldn't turn this into a turkey shoot.
Luckily, almost all of the German squads my troops came in contact
with were severely under-strength. Most of them if not surrendering
died or ran away to fight another day. I guess the heavy fire
they received by my tanks paid off after all.

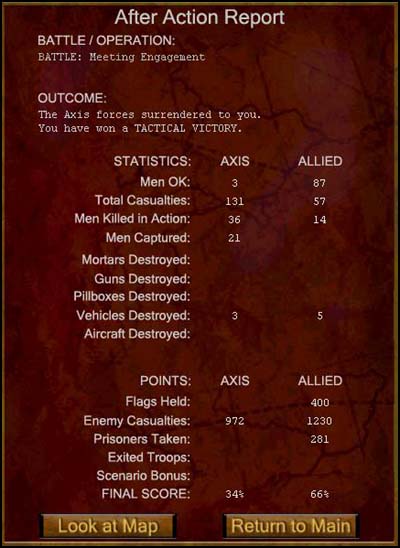
With the battle over and my troops victorious,
we were approaching the end of the game, with me beginning to
mop up what little was left of German resistance. Hunter, who
did not want to waste his, or my time, surrendered.
 The battle in Pescara turned
into a route for the Germans, who were retreating to the northern
mountains of Italy, where they were setting up a new defensive
line. The beginning of the end for the Germans was near but they
were willing to fight on. The Italian Campaign would prove to
be one of the bloodiest operations of the whole war. I'm Roger
Mudd, thanks for watching.
The battle in Pescara turned
into a route for the Germans, who were retreating to the northern
mountains of Italy, where they were setting up a new defensive
line. The beginning of the end for the Germans was near but they
were willing to fight on. The Italian Campaign would prove to
be one of the bloodiest operations of the whole war. I'm Roger
Mudd, thanks for watching.

|
 Home
Forum
Starcraft Tournaments
Home
Forum
Starcraft Tournaments

